
You know the disappointment. You spend an hour building a beautiful pot of tortilla soup, you ladle it into bowls, you pile on the toppings, and then you add the tortilla strips. Within 90 seconds, they are limp, greasy, and sad. By the time you reach the bottom of the bowl, they have dissolved into mush.
Here is the truth: soggy strips are rarely the strips’ fault. They are a timing and technique problem. Restaurant kitchens solved this decades ago. You can solve it in your own kitchen with about 15 minutes and a bottle of oil.
Quick Answer 🔎
How to Make Crispy Tortilla Strips for Soup That Stay Crunchy
Cut day-old corn tortillas into thin strips (about 1/4 inch wide). Fry them in neutral oil at 350°F for 45 to 60 seconds until golden and puffed. Drain on a wire rack — not paper towels — and salt immediately. Store them uncovered at room temperature. Add them to the bowl at the table, not in the kitchen, and always keep a backup batch in the pantry.
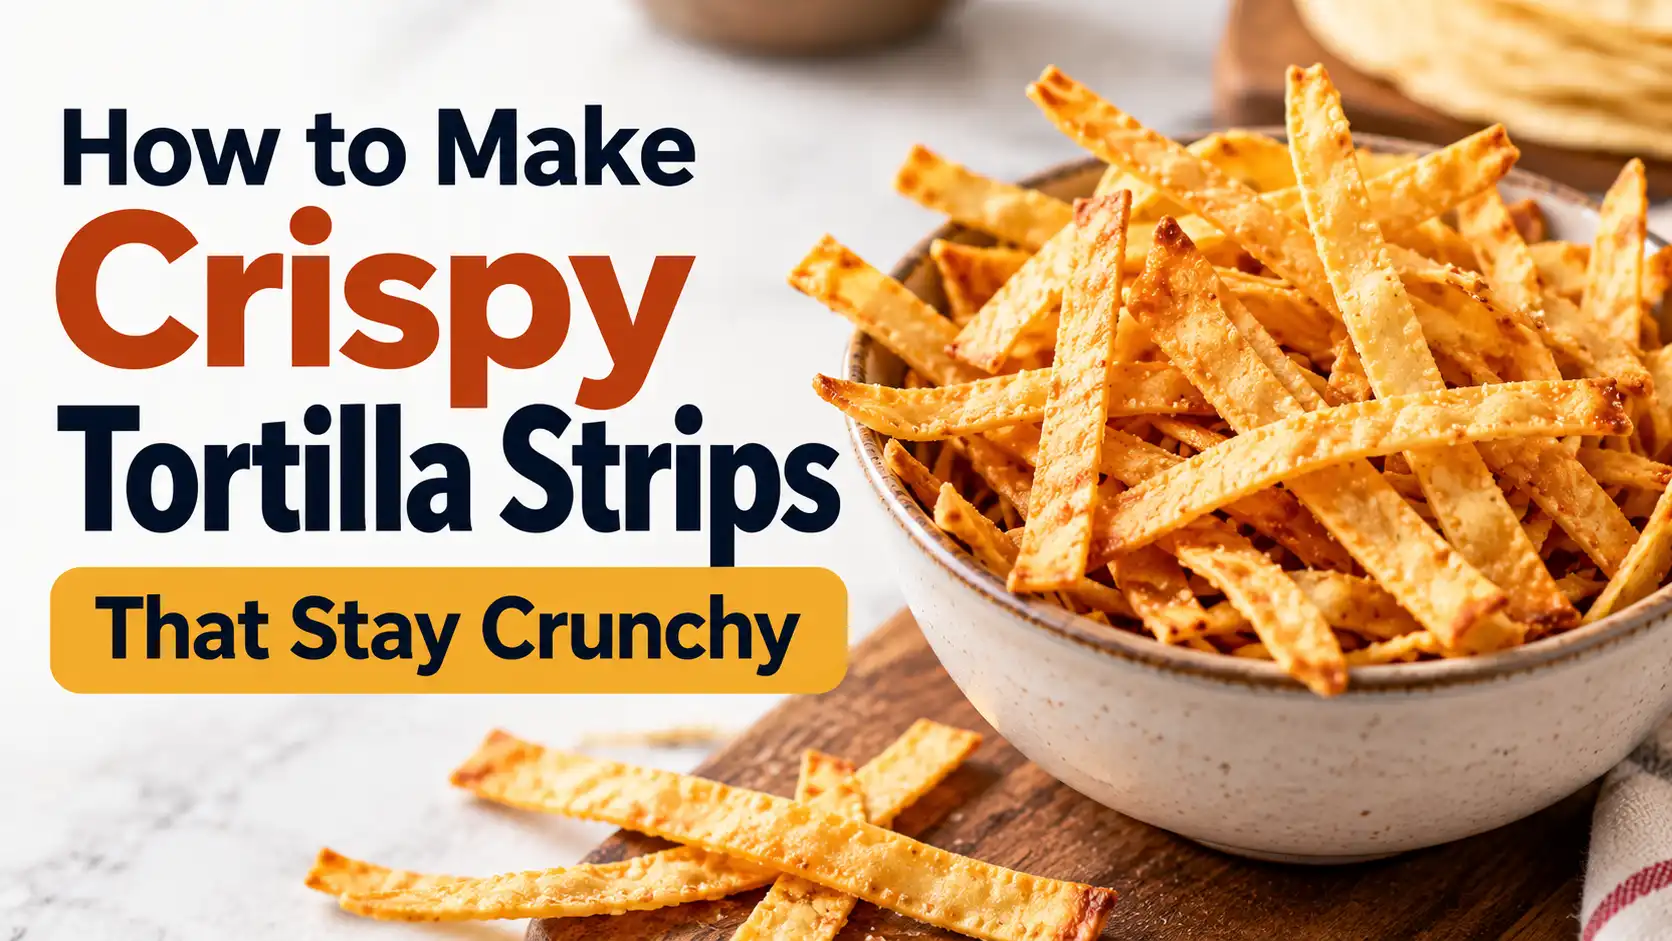
Table of Contents
That is the short version. Here is everything else you need to know.
Why Homemade Strips Beat Store-Bought Every Time
Bagged tortilla strips are convenient. They are also usually a disappointment.
Here is what you are actually getting in most bags:
- Old oil. Commercial fryers reuse oil for days. That stale, slightly bitter flavor transfers straight to the chip.
- Too much salt. Bagged strips are heavily salted to mask the oil. That salt pulls moisture out of the air and makes them soften faster.
- Inconsistent thickness. Some strips are thin and shatter. Others are thick and tough.
- No control. You cannot adjust the seasoning, the thickness, or the fry time.
Homemade strips solve all four problems. They cost about $1.50 for a batch that serves 12 people. They taste like actual corn. And when you make them yourself, you control every variable that determines whether they stay crunchy.
The good news: this is not a hard technique. It is a temperature and timing technique. Once you learn the two numbers, you will never go back to the bag.
What You Need to Make Crispy Tortilla Strips
You do not need a deep fryer. A heavy pot and a thermometer will do.
Ingredients:
| Item | Amount | Notes |
|---|---|---|
| Corn tortillas | 12 | Day-old is best |
| Neutral oil | 4 cups | Canola, vegetable, peanut, or avocado |
| Kosher salt | 1 teaspoon | Fine salt works too |
| Optional: chili powder | 1/2 teaspoon | For seasoned strips |
| Optional: lime zest | 1 teaspoon | Brightens the flavor |
Equipment:
- A heavy-bottomed pot or Dutch oven (at least 4 inches deep)
- A deep-fry thermometer or instant-read thermometer (non-negotiable)
- Tongs or a spider strainer
- A wire cooling rack set over a sheet pan
- A sharp knife or pizza cutter
- A cutting board
Why a wire rack and not paper towels? Paper towels trap steam under the strips, which is the exact thing that makes them go soft. A wire rack lets air circulate underneath so they cool crisp and stay crisp. This is the single most overlooked step in home frying.
Step 1: Choose the Right Tortillas
Not all corn tortillas fry the same way. Here is what to look for.
The best choice: day-old corn tortillas.
Fresh tortillas hold too much moisture. When they hit hot oil, that moisture turns to steam and the strip puffs unevenly or goes limp. Day-old tortillas have dried out slightly, which means they fry faster and crisper.
How to “age” fresh tortillas:
If you only have fresh ones, spread them on a sheet pan and leave them uncovered on the counter for 2 to 4 hours. You can also stack them and refrigerate them overnight in a paper bag.
What about white vs. yellow corn?
Both work. Yellow corn tortillas have a slightly deeper, toastier flavor. White corn is milder and more neutral. For soup topping, I prefer yellow.
Can you use flour tortillas?
You can, but they behave differently. Flour tortillas fry into lighter, flakier chips that soften almost instantly in soup. If you want a topping that holds up for more than a minute, stick with corn.
What about thick-cut “restaurant style” tortillas?
Thicker tortillas make a heartier strip, but they take longer to fry and can be chewy in the middle if you rush them. For soup, thinner is better. Standard corn tortillas are ideal.
Avoid:
- Tortillas that are cracked, brittle, or stale to the point of snapping
- Tortillas with visible mold spots (this happens faster than people realize)
- Any tortilla that smells sour or off
Step 2: Cut Them the Right Way
The cut determines whether your strips stay crisp. Here is the method.
The size that works:
- Width: about 1/4 inch
- Length: about 2 to 3 inches
This is the size most restaurants use. It is wide enough to hold up in the bowl but thin enough to fry all the way through in under a minute. Thicker strips (1/2 inch) take longer to cook and often end up chewy in the center.
The technique:
- Stack 4 to 5 tortillas on your cutting board.
- Cut the stack in half with a sharp knife or pizza cutter, creating two half-moon shapes.
- Stack the halves and cut them crosswise into 1/4-inch strips.
- Separate the strips with your fingers before frying. If they are stuck together, they will fry into clumps with raw centers.
Pro tip: A pizza cutter is faster and produces cleaner cuts than a knife. If you make these often, buy a dedicated pizza cutter just for tortillas.
Pro tip #2: If you want long, elegant strips for a topping bar, cut the tortillas into full-length strips instead of halving them first. Just be aware that long strips are more likely to tangle in the oil.
Do not skip separating the strips. This is the most common cause of uneven frying. Clumped strips trap moisture and never get fully crisp.
Step 3: Get Your Oil to the Right Temperature
This is the step where most home cooks fail. Temperature is everything.
The magic number: 350°F.
Here is what happens at different temperatures:
| Oil Temperature | What Happens |
|---|---|
| Below 325°F | Strips absorb oil and turn greasy and soggy |
| 350°F | Perfect. Golden, puffed, crisp in 45–60 seconds |
| Above 375°F | Strips brown on the outside before the inside cooks, and taste burnt |
| Above 400°F | Oil begins to break down and smoke, producing off flavors |
How to heat your oil:
- Pour 4 cups of neutral oil into a heavy pot. You want at least 2 inches of depth so the strips can float and fry evenly.
- Clip your thermometer to the side of the pot. Make sure the tip is submerged but not touching the bottom.
- Heat over medium-high heat.
- Wait for the oil to reach 350°F. This usually takes 8 to 12 minutes.
Do not eyeball it. Tossing a pinch of flour in the oil to see if it sizzles tells you almost nothing about the actual temperature. A $10 thermometer is the difference between restaurant-quality strips and greasy ones.
How to maintain temperature:
When you add cold tortilla strips to hot oil, the temperature drops. That is normal. The fix is to fry in small batches (see below) and give the oil 30 to 60 seconds to recover between batches. Keep an eye on the thermometer and adjust the burner as needed.
Why not use olive oil?
Olive oil has a lower smoke point and a strong flavor that competes with the corn. Save it for salad dressing. Use canola, vegetable, peanut, or avocado oil for frying.
Why not use reused oil?
You can reuse frying oil 2 to 3 times if you strain it and store it properly. After that, it starts to break down and produces off-flavors. If the oil smells fishy, foams excessively, or has turned dark, throw it out.
Step 4: Fry in Small Batches
This is the step where impatience ruins good strips. Crowding the pot is the fastest way to make soggy chips.
The rule: fry in batches of 10 to 15 strips at a time.
Here is why. When you add too many strips at once:
- The oil temperature crashes
- The strips steam instead of fry
- They stick together
- They absorb oil instead of repelling it
- They come out greasy and soft
The method:
- Test one strip first. Drop a single strip into the oil. It should start bubbling immediately and float to the surface within a few seconds. If it sinks and sits there, your oil is not hot enough.
- Add a small handful — about 10 to 15 strips.
- Fry for 45 to 60 seconds. Watch them closely. They will puff up and turn golden brown.
- Flip once with tongs or a spider strainer at the halfway point to ensure even cooking.
- Remove with a spider strainer or tongs the second they are golden. Do not wait for them to turn dark brown. They will continue to cook for a few seconds after they leave the oil.
Visual cue: The strips are done when they are light golden brown with slightly darker edges and have visibly puffed. If they look pale, they are underdone and will be chewy. If they look deep brown, they are overcooked and will taste bitter.
At exactly 350°F, a properly cut strip fries in 45 to 60 seconds. If yours are taking longer, your oil is too cool, or your strips are too thick.
Step 5: Drain, Salt, and Season
How you handle the strips immediately after frying determines whether they stay crisp.
Do this:
- Lift the strips out of the oil with a spider strainer or tongs. Shake off excess oil.
- Transfer immediately to a wire cooling rack set over a sheet pan.
- Salt right away. Salt sticks to hot, oily surfaces. If you wait until they cool, the salt slides off.
- Let them cool completely — about 5 to 10 minutes — before storing or serving.
Do not do this:
- Do not pile strips on paper towels. The steam gets trapped underneath, and they soften.
- Do not stack hot strips on top of each other. They will steam each other and go limp.
- Do not salt over the pot of oil. You will contaminate your oil, and it will pop and splatter.
Seasoning variations:
Once you master the basic salt, you can branch out:
- Chili-Lime: 1/2 teaspoon chili powder + 1 teaspoon lime zest + 1/2 teaspoon salt
- Smoky: 1/2 teaspoon smoked paprika + 1/4 teaspoon garlic powder + 1/2 teaspoon salt
- Cumin-Salt: 1/2 teaspoon ground cumin + 1/2 teaspoon salt
- Spicy: 1/4 teaspoon cayenne + 1/2 teaspoon salt
Toss the seasoning with the strips in a bowl while they are still slightly warm so it adheres.
Alternative Methods: Air Fryer, Oven, and Microwave
Not everyone wants to deal with a pot of hot oil. Here is how the alternatives stack up.
Air Fryer Method
Best for: Small batches, lower mess, weeknight cooking
- Toss strips with 1 tablespoon of oil in a bowl.
- Preheat air fryer to 375°F.
- Arrange strips in a single layer. Do not overlap.
- Air fry for 5 to 7 minutes, shaking the basket halfway through.
- Salt immediately and cool on a wire rack.
Result: Crispy, but slightly drier and less puffy than fried. They stay crunchy for about 2 hours, versus 4 to 6 hours for fried.
Oven Method
Best for: Large batches, hands-off cooking
- Toss strips with 1 to 2 tablespoons of oil.
- Spread in a single layer on a sheet pan.
- Bake at 400°F for 10 to 12 minutes, flipping once at the halfway point.
- Watch closely near the end. They go from golden to burnt fast.
- Salt immediately and cool on a wire rack.
Result: The least crispy of the three methods. They work in a pinch but soften quickly in soup. Best for baked chip recipes rather than soup topping.
Microwave Method
Best for: A single serving, desperation, and nothing else
- Toss strips lightly in oil.
- Spread on a microwave-safe plate.
- Microwave on high for 1 to 2 minutes, checking every 30 seconds.
Result: Uneven. Some strips burn while others stay chewy. Only use this if you have no other option.
The verdict: If you want restaurant-style strips that actually stay crunchy, fry them. The other methods work, but they do not match the texture.
[Link to our Step-by-Step Guide: How to Make Crispy Baked Tortilla Strips]
The Real Secret: How to Keep Them Crispy at the Table
Here is the thing nobody tells you: the strips are not the problem. The soup is.
Hot soup produces steam. Steam is the enemy of crispiness. If you add strips to the bowl in the kitchen and then walk them to the table, they will already be softening by the time your guests pick up their spoons.
The solution is simple:
- Serve the strips on the side. Put them in a bowl next to the soup pot.
- Let guests add their own. This is the entire point of a topping bar. [Link to our DIY Chicken Tortilla Soup Topping Bar Guide for Crowds]
- Keep a backup batch in the pantry. Refill the bowl halfway through the party. This is what restaurants do — they never put out more than a small amount at a time.
- Never dump strips into the soup pot. Ever. Not even at the end. They will turn to mush in under two minutes.
If you want maximum crunch:
Some people add a small handful of strips to the bottom of the bowl before ladling in the soup. This creates a soft, flavorful layer at the bottom — almost like dumplings — while the strips on top stay crunchy. This is a restaurant trick, and it works beautifully. Just make sure you also offer fresh strips on top.
The 90-second rule:
A properly fried strip holds its crunch in hot soup for about 90 seconds to 2 minutes. After that, it starts to soften. This is not a flaw. This is physics. The fix is not to make a better strip. The fix is to add them at the table.
How to Store Tortilla Strips So They Stay Crunchy
If you make a big batch ahead of time, storage matters.
The right way:
- Let the strips cool completely on the wire rack. Any residual heat will create steam in the container.
- Transfer to a paper bag or a container lined with a paper towel.
- Leave the container loosely covered or open. Airtight containers trap moisture.
- Store at room temperature, away from heat and humidity.
Shelf life:
- Fried strips: 4 to 6 hours at peak crunch, up to 2 days if stored properly
- Air fryer strips: 2 to 4 hours at peak crunch
- Baked strips: 1 to 2 hours at peak crunch
How to revive soft strips:
If your strips have gone soft, spread them on a sheet pan and bake at 350°F for 3 to 5 minutes. This drives off the moisture and re-crisps them. It is not as good as fresh, but it works in a pinch.
What not to do:
- Do not refrigerate them. Cold storage introduces moisture, and they will go stale.
- Do not store them in the same container as the soup or other wet ingredients.
- Do not stack heavy bowls on top of them.
Make-Ahead Timeline for a Party
If you are hosting, here is how to time your strips so they are at peak crunch when guests arrive.
1 day before:
- Buy corn tortillas and leave them on the counter to dry out slightly.
- Pull out your wire rack, sheet pan, and thermometer.
2 hours before:
- Cut the tortillas into strips. Store them in a bowl at room temperature. Do not cover tightly.
45 minutes before:
- Heat your oil to 350°F.
- Fry the strips in batches.
- Drain on the wire rack and salt immediately.
- Let cool completely.
30 minutes before:
- Transfer cooled strips to a serving bowl.
- Place them on the topping bar with a small spoon or tongs.
During the party:
- Keep a backup bag or container in the pantry.
- Refill the bowl every 30 to 45 minutes. Do not let it sit empty or clumped.
Safety note: Per USDA guidelines, do not leave perishable toppings out for more than 2 hours. Tortilla strips themselves are shelf-stable, but the cheese, crema, and avocado on your bar are not. If the room is above 90°F, that window drops to 1 hour.
Common Mistakes and How to Fix Them
| Mistake | Why It Happens | The Fix |
|---|---|---|
| Strips are greasy | Oil was below 350°F | Use a thermometer and wait for the right temp |
| Strips are chewy | Cut too thick or fried too briefly | Cut 1/4 inch wide, fry 45–60 seconds |
| Strips are burnt | Oil was above 375°F or fried too long | Pull them the second they turn golden |
| Strips clumped together | Not separated before frying | Separate with your fingers first |
| Strips went soft in 5 minutes | Added to soup in the kitchen | Serve on the side, add at the table |
| Strips taste bland | Salted after cooling | Salt immediately out of the oil |
| Strips taste like old oil | Oil was reused too many times | Use fresh oil or strain and replace |
| Strips are unevenly cooked | Too many in the pot at once | Fry in batches of 10–15 |
| Strips got soggy overnight | Store airtight or in the fridge | Store loosely at room temperature |
Common Questions
How do I make crispy tortilla strips for soup that stay crunchy?
Cut day-old corn tortillas into 1/4-inch strips. Fry at 350°F for 45 to 60 seconds. Drain on a wire rack, salt immediately, and store loosely at room temperature. Serve on the side and add at the table.
Should I use corn or flour tortillas?
Corn. Flour tortillas fry into lighter chips that soften almost instantly in soup. Corn strips hold their crunch much longer.
How thick should I cut the strips?
About 1/4 inch wide and 2 to 3 inches long. Thinner strips burn. Thicker strips stay chewy in the center.
What oil is best for frying tortilla strips?
Canola, vegetable, peanut, or avocado oil. All have high smoke points and neutral flavor. Avoid olive oil.
Can I fry tortilla strips without a thermometer?
You can, but you will not get consistent results. A $10 deep-fry thermometer is the single best investment for this technique.
How long do fried tortilla strips stay crispy?
At peak crunch, about 4 to 6 hours if stored properly at room temperature. In hot soup, about 90 seconds to 2 minutes.
Can I make tortilla strips in the air fryer?
Yes. Toss with 1 tablespoon of oil, air fry at 375°F for 5 to 7 minutes, shaking halfway. They are crisp but slightly drier than fried.
How do I re-crisp soft tortilla strips?
Spread them on a sheet pan and bake at 350°F for 3 to 5 minutes.
Can I make these ahead of time for a party?
Yes. Fry them up to 2 days ahead and store them loosely at room temperature. For best results, fry them the same day.
Why do my tortilla strips turn soggy so fast?
Because you are adding them to the soup too early. Steam from the hot soup softens them. Serve them on the side and let guests add their own.
Are tortilla strips gluten-free?
Yes, if you use 100% corn tortillas. Check the label — some brands add wheat flour. Also check that your fryer oil has not been used for breaded items.
Can I reuse the frying oil?
Yes, 2 to 3 times. Strain it through a fine mesh strainer or cheesecloth, store it in a cool dark place, and discard it when it darkens, foams, or smells off.
How many tortillas do I need for 12 people?
About 12 corn tortillas will make enough strips for 10 to 12 people as a topping. If you want extra for refills, buy 18.
Can I season the strips with something other than salt?
Yes. Try chili powder, lime zest, smoked paprika, garlic powder, or cumin. Toss while the strips are still slightly warm so the seasoning sticks.
The Takeaway
Perfect tortilla strips come down to three things:
- Temperature: 350°F, every time.
- Timing: 45 to 60 seconds, no longer.
- Service: On the side, added at the table, never in the pot.
Everything else — the type of tortilla, the cut, the seasoning — matters, but those three things are what separate restaurant-quality strips from sad, soggy ones.
Do this once, and you will never buy a bag again. The difference is not subtle. It is the difference between a topping that disappears into the soup and one that makes every bite worth eating.